Thursday, November 12, 2009

Brief Update & Looking Back


Sorry we haven't updated in a while. Kristen and I are very busy with some less blogworthy (but not less interesting!) home projects at our new place. This includes cleaning and repairing the chicken shed, installing a new chimney and woodstove, and of course putting up the greenhouse. So far those are all still works-in-progress, but we did manage to fix the barn roof. Big thanks to mom and Michael for helping us out with that (and a half-dozen other home projects).


I'm already looking forward to next year's garden. We definitely learned a lot last season. Some things I've been thinking about:

Bed Width. We did double-wide beds in our garden last season, mostly because we had our beds shaped by a tractor. This seemed to work well for strawberries and beans, but for potatoes, cabbages, broccoli, and a lot of other things, I think it simply left too much room for weeds to grow up in the middle.

Blight. Like a lot of growers, our experience with early blight last year was probably worse than usual, but I still think we're definitely going to experiment with some organic fungicides next year.

Materials. Every year I garden I look back and think about how much easier it would have been if I had collected the right materials beforehand. When I was living in New Jersey I had a community garden plot with access to an almost unlimited supply of compost and wood chips. You don't realize how valuable this stuff is until you buy it and truck it in yourself, or until you spend your weekend afternoons shoveling a free pile into the back of a pickup truck. I'm still not sure how we're going to source all the materials we'll need next year, since late winter and early spring will mostly be devoted to digging tree holes.

More Squash Earlier. I'm always disappointed by transplant shock in squash, and always impressed by the damage done by squash vine borer. Next year I'd like to direct-seed more squash (if we have the space) and be better about controlling the borer (which wasn't too bad this year).

As we look forward to getting chickens, I'm always thinking of ways they might be used in the garden. Chickens aren't stupid and will eat anything that tastes good. They'll peck at melons, tomatoes, and they'll wreak havoc in mulched beds in search of insects. But I've always wanted to release chickens into a garden after the harvest to control overwintering insects like vine borer pupae or Colorado potato beetles. I think it might be worth a try.

More on our other projects later.


Wednesday, September 9, 2009

Late-Summer Update

We haven't been able to update lately, mostly because we've been busy moving into our new house. At the end of August, we moved to West Jefferson with the help of many of our Ashe County friends. We have a lot of plans for the new place -- a greenhouse, a new garden, chickens, and of course more hazelnuts.

Meanwhile, we've been harvesting from our garden in Glendale Springs and going to the farmers' market when we have time. Below is one of Kristen's beautiful displays of fingerling potatoes at the market, which is the main thing we've sold this year.


Many of our potatoes were hit very hard by the blight. But some varieties that were hit the hardest still yielded well. Among the best producers this year was the "Red Thumb" -- those are the bright pink ones in that basket -- which were very colorful, high-yielding, and had great flavor and consistency. The "Banana" and "La Ratte" varieties also did well.


Above is a basket of "Rose Crescent" fingerlings, tomatoes, basil, flowers, and broccoli from the garden. Our house is a kind of bottomless pit for tomato sauce and it is impossible for us to can enough, with or without late blight, which finally took our tomato plants last week after creeping up on us all season.


Occasional garden-helpers (and badminton pros) Mitch and Josh demonstrate the great variety in potato sizes. The Guinness Book of World Records does not have an entry for world's smallest potato... yet.


This picture gives you a better idea of some of the color varieties of our fingerlings. The red ones are "Red Thumbs", the yellow ones are most likely "Bananas", and the black ones are "Peruvian Purples". Although they add a lot of color, the purples were among the least productive we had this year.

Experiments at the Bell household show that fresh fingerling potatoes go very well with wine-poached scallops. We'll have to reproduce our findings several times to be sure!

We've also had a good yield of Delicata squash, which are so sweet and buttery when baked that they hardly need any sugar or butter. It's difficult to get enough of them.

Green beans have been a huge success - pest-free and producing all season long. The winner for taste, tenderness, and productivity is definitely "Rattlesnake," green with purple streaking. We've been getting watermelons and muskmelons, but it's hard for us to tell when these are ripe.

Anyway, that's the news from Glendale Springs.

Friday, July 3, 2009

Garden Update

By now, of course, the garden is a huge, weedy jungle! But here are some catch-up photos... The garden on June 6th: strawberries, newly-transplanted tomatoes, brassicas, potatoes, beans.


The potatoes are all taking the pest problems differently. Some varieties have been hit very hard, while others seem almost untouched.


That's our broccoli up there in the blue, with onions behind it.


We were lucky enough to get an afternoon's help from twin garden elves! Thanks, Josh and Mitch! Come back soon!

With their help we planted winter and summer squash, melons, and cukes.


Below is a row of squash mounds. For these we pile up a lot of brush, water it down, and make pockets of compost in it. The baby squash are transplanted into the pockets and and climb down the hills as they grow.


Friday, June 5, 2009

Planting & Pests


Potato bed (and blooming rhododendrons) on May 21st, 11 days after planting. We planted 12 varieties of potato, most of them fingerlings - about 350 plants total. Well, David loves potatoes. Also, we're planning on selling them at the market.

Snazzy paint job on the garden gate, Mom!


I don't think we've talked about garden fertilizer yet. With the help of a free soil test from the NC Dept of Ag and recommendations from our very knowledgeable extension agent Richard Boylan, we decided to add calcitic lime to increase the pH, and (pictured above, L to R) greensand (a potassium-rich ancient seabed deposit mined in NJ), bonemeal (high in phosporus), and humic acid (a stable form of carbon - this mix we bought from Seven Springs Farm in Floyd, VA). We applied about 700 pounds of lime, 100 lb each of bonemeal and humic acid, and 200 lb of greensand to our 100 x 60 ft garden.

Beans on May 26th, 6 days after planting. We planted 14 varieties - most of these are tasty and beautiful as dried beans, and we're planning to sell these at the farmer's market too.


Potatoes on May 31st! They look nice, but what you can't see is the war we've been waging with the Colorado potato beetle.


These beautiful beetles emerge from underground in mid-spring, mate, and lay lots of orange eggs on the bottoms of potato leaves. Unfortunately, it's us (and our potatoes) or them - so we do thorough searches every couple of days and squish every beetle and egg cluster we can find. Mulching the potatoes should also help, according to ATTRA, while also increasing potato yields.


The other pests we've had some problems with so far are flea beetles and slugs. Here is a pac choi plant showing damage from both. The flea beetles leave tiny holes in the leaves of brassicas and potatoes (just cosmetic damage so far), and the slugs have been eating large holes in the lower leaves of the brassicas, where they touch the mulch. Since the greens are just for us to eat, we're not going to worry about flea beetles. A floating row cover would be a good protection against flea beetles if we wanted beautiful greens. For the slugs, we put out small cat-food tins full of cheap beer - the slugs are attracted to the yeast and happily drown in it.


"Ruby perfection" cabbage.


First harvest - easter egg radishes!


Turnips and peas. I read somewhere that if you plant peas close together in a big patch, they will grow up supporting each other (instead of needing a fence) - we'll see!


Onions like it sunny and weed-free.

Sunday, May 24, 2009

Little trip up north...

We just returned from a brief road trip to New Jersey and New York, where we caught up with friends and family. Along the way we visited our friends at Regeneration CSA in High Falls, NY. Regeneration is located right next to the Mohonk Preserve where I used to go hiking and fishing with my dad. It's a beautiful area.


Regeneration is a CSA, which stands for Community Supported Agriculture. That's a system where members of the local community buy shares in a farm at the start of the season to pay for the farm's expenses. In exchange they get a weekly share of the produce throughout the growing season. In addition to being a good economic model, CSAs are also a great way for people to participate in the growing of their food. Many CSAs -- including Regeneration -- hold regular tours, workshops, potlucks, and many other events that educate people about farming and help build relationships between people and their food.


Here's me with Sarah and Kevin, who started Regeneration in 2007. Before that they were working on the farm where Kristen and I met (well, actually, they set us up -- but that's another story). Regeneration uses permaculture growing techniques. Permaculture is (among other things) a theory of designing gardens, farms, and landscapes that mimic relationships found in nature. The idea is that ordinary problems like pest control, irrigation, fertilization, and many others can be solved in more ecologically sustainable ways by recreating structures found in the natural environments around us. In a lot of ways it takes the ideas of organic farming to the next level.


They start vegetable seedlings in a salvaged kit greenhouse that they modified to be solar heated. The walls are made of double-walled polycarbonate glazing ("twinwall"), which keeps the heat in. A home-made solar collector heats water and circulates it into the greenhouse. A pile of decomposing compost in the back also gives off some heat. Kevin is kind of a genius when it comes to improvising things like this -- the water is moved by a solar-powered pump he threw together and it's heated in black plastic tubes normally used to warm up swimming pools. The greenhouse doesn't stay as warm as an electric- or propane-heated greenhouse, but it uses minimal fossil fuel inputs, and gives seedlings a good head-start on the growing season.


The seedlings then graduate to this coldframe (above), which is kind of a miniature version of a hoop-house -- what a lot of farmers use to extend their seasons in cold climates. It takes the edge off the cold nights and lets the plants warm up during the day.


Beautiful herb and flower seedlings for sale. (Seedlings for planting are still in soil blocks.)


This is one of many types of no-till beds found at Regeneration. This means that they generally don't plow up the ground when they plant. Instead, they cover over the previous year's bed (or over a mowed field or lawn) with paper, compost, and mulch. All the weeds and dead roots from the previous year decompose. The idea is that by leaving the soil alone and simply adding on top of it, you improve soil structure, organic matter content, and the diversity of organisms living in the bed. All of these things make the plants healthier, improves drought and disease resistance, and makes soil nutrients more available -- which is very important when you don't use chemical fertilizers.


Here are some more no-till beds. All that hay is used to keep the weeds down and to keep moisture in. Vegetable starts are planted into pockets of compost.

Being at a farm like this makes our garden look like a little patch of barren dirt! It takes a lot of hard work and careful growing decisions to build up the soil, and we're definitely going to experiment with no-till next season.

Tuesday, May 5, 2009

Spring update

So much has happened in the past 2.5 weeks! Look at the leaves on our hazels!

The different varieties are leafing out at different times, but the good news is that so far none have died on us. Tonda di Giffoni (pictured above) is the earliest - she is our Italian principesa.

We have installed most of the irrigation system for the hazels: 1/2 inch plastic tubing with two 1-gallon/hour emitters per tree.

Kevin Burgess tilled our garden, and made beds 3-4 ft wide with a special home-made attachment on his tractor.

We put up a 4-ft high woven wire fence to keep out rabbits, neighborhood dogs, etc... David dug a trench all the way around to bury the bottom of the fence 3-4 inches.

Joanie's gate! She sure classed up the garden. Thanks, Mom!

These lush and verdant thickets are our soil block trays, 6 weeks after planting. Huge thanks to friends Hollis and Jay Wild, who watered them several times a day in their greenhouse!

We planted broccoli, brussels sprouts, red and green cabbage, and pak choi - just stuck their soil blocks into compost pockets in the bed - zero transplant shock. They're mostly planted at 12-inch spacing, to correspond to the slits in our drip tape. We're excited about drip irrigation, because it's the most water-efficient method out there. Seeds were also sown in the past week: peas, carrots, radishes, turnips, parsnips, rutabaga, beets. And we planted a pound of onion sets. Of course all of this should have happened three weeks ago.

And finally, the strawberries! David was skeptical, but I bought 200 bare-root plants from Fedco: Earliglow, Sparkle, Jewel, and Seascape. It's hard to kill strawberries. These were left in the box for a couple of weeks while we waited for tilling weather. Now look at them!

Wednesday, April 22, 2009

Hazels all planted

On April 17 we finished planting all the hazels! The final two varieties to go in were Geneva and Santiam. This was also Joanie's birthday, so we celebrated both achievements with chocolate cake.

Saturday, April 11, 2009

Planting Hazels!

After many months of talking about and waiting for our hazelnut trees, we finally have most of them planted. All of this was preceded by several weeks of digging holes and making cages out of hardware cloth. We wanted to give our trees a good start, so we dug large holes - about 3 ft wide and 18 inches deep.

And then we added lots of compost to the soil to refill the hole. The compost will provide the trees with nutrients and will also help them retain water during the summer.


We're planting 8 varieties of hazelnuts from two different nurseries. The first batch arrived on March 31: bare-root 2-yr-old layered clones of Tonda di Giffoni, Halle's Giant, Gamma, Delta, and Yamhill. It's very important that the bare roots don't dry out, so we dipped the roots in a gel that helps keep them wet. We then heeled them into our pile of finished compost. They stayed pretty happy there, which gave us a week to get them into the ground -- which we needed, since there were 38 to plant in the first batch!

We partially refilled each hole with a mixture of soil and compost, and we made sure that the collar of each tree was level with the ground. We spread out the roots, held the tree straight, and started filling the hole with compost and soil.

For protection from the vicious Glendale rabbits (who ate the tops off our first four hazels over the winter), we constructed 3-ft-high, 6-inch-diameter cages out of 1/2-inch hardware cloth. We buried the bottoms of the cages a couple of inches as we refilled the holes. Between those and the family of stray cats nearby, we're hoping our trees will be safe from rodents.


Hazelnut trees naturally grow with multiple trunks coming up from the base, which can make it difficult to walk through the orchard for harvesting and maintenance. Our tree cages will help us train them into single-trunked trees. Pruning some of the buds off will also help the trees put more of their energy to establishing a healthy root system.

According to our soil test, we have pretty poor soil to work with - low in organic matter, pH around 5, and low in nitrogen, phosphorus, calcium, and potassium. Hazels like a rich soil (higher pH), so we added about 1/2 c of calcitic lime to each hole. (We will also top-dress with about 10 lbs of lime per tree.) We also added 1/2 c of rock phosphate to each hole, a slow-release phosphorus source to stimulate root growth.

Most of what we're adding is slow-release, and we hope that periodic top-dressing with compost and manure will help stabilize the pH and keep the levels of nutrients in the soil high. It will take time and lots of care to get there, though.

We also added two products from Oikos Tree Crops. The first is a root-zone "tea bag" made from fish, alfalfa and feather meal (yum) and potash inoculated with mycorrhizal fungus. The second is a slow-release macro-micronutrient tab which dissolves over the course of two years. We have no idea if they'll work, but we're hoping they'll help to make up for some of the initial nutrient deficiencies of our soil.

Finally, we gave each tree a good watering-in (Joanie at the hose, here). It's been a rainy spring so far, which helps the chances for our trees establishing themselves properly.


We're expecting to lose some trees, particularly the Yamhill and Halle's, which had very poorly-developed roots when they arrived. We've been watering them every day it doesn't rain, and soon we'll mulch them to protect them from grass. After that we'll install a drip irrigation system that will give the trees a steady supply of water over the summer.

Wednesday, March 25, 2009

Starting

Spring is finally here after a long winter of getting settled in Glendale Springs, planning our garden, and ordering everything we'll need to get started.

For our first year we'll be planting 50 hazelnut trees, several rows of strawberries, and working on a small garden. We're going to be growing potatoes, squash, beans, and smaller amounts of other kitchen vegetables as well. We're hoping to sell some of our produce at the Ashe County farmer's market in West Jefferson.


One of the first things we wanted to do with our garden is improve the soil. Normally we would do this by collecting and composting material throughout the year and adding it to our growing space. Since we were new this year, we ended up buying a pile of finished compost, which will let us get off to a good start.


We also need compost for our trees. Planting our trees in pockets of compost will help them get access to nutrients, grow healthy roots, and will help the soil retain moisture. Soil with a healthy amount of organic matter will also help moderate the pH.


But we will also have to start making our own compost -- for next year and for later this season. Next to Kristen is a pile of goat bedding and manure, courtesy of Lon & Carol Coulter's goat dairy in Jefferson. We will bulk it up with leaves and turn it regularly so it breaks down evenly. Kristen is mixing a bucket of peat to make soil blocks for our vegetables.


Soil-blocking is a way of starting your vegetable garden without pots. A soil block recipe is very similar to a potting mix recipe, and we hear that they are sometimes interchangeable. The soil block mix is compressed into cubes using a metal tool called a soil blocker. We ordered ours (as well as most of our seeds) through Fedco. One of the nice things about soil blocks is that they can be planted directly into the ground without disturbing the roots of the young plant.


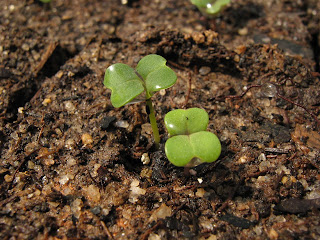
Here is a pair of pak choi starts emerging from a soil block. It looks like they're almost as eager to get started as we are.